1. First imaging tags.
The opening image tag
goes like this:
<IMG SRC="...">
You have to know the location of your image. The image must exist in your directories, or somewhere else on the web. Let's say you have uploaded one of your images onto the server in your directory.
2. The image url.
Now, you must include the name of the image
in your directory. for example:
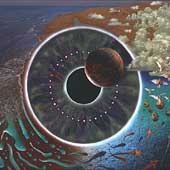
you uploaded this picture to your directory
(titled "03.jpg"):
Now, you want this image to appear on your page. These tags will do that (where 3.jpg is, the name of your image should be.):
<IMG SRC="03.jpg">
3. Image attributes.
Say your picture is a little too big.
You can add height and width attributes to the image tags (the number value in these attributes is in pixels).
<IMG SRC="03.jpg" HEIGHT="50" WIDTH="100">
Will give you:
You can change the height and width attributes as needed.
4. Border.
You can also add a border attribute:
<IMG SRC="03.jpg" HEIGHT="150" WIDTH="100" BORDER="5">
This will give you:
5. Text alignment.
There are certain ALIGN tags too:
| ALIGN="LEFT" | Aligns the text to the right and bottom of the image. |
| ALIGN="RIGHT" | Aligns the text to the left (putting the image at the right of the screen) of the image. |
| ALIGN="TOP" | Aligns the text to the right and top of the image. |
| ALIGN="BOTTOM" | Aligns the text to the bottom of the image. |
<IMG SRC="03.jpg" HEIGHT="170" WIDTH="170" BORDER="5" ALIGN="BOTTOM">Beautiful!
Beautiful!